[InvoiceOcean — Support](https://help.invoiceocean.com/index.md)
# [OCR – automatic invoice reading for Expenses (BETA)](https://help.invoiceocean.com/ocr-automatic-invoice-reading-for-expenses.md)
The **OCR** feature in InvoiceOcean **automatically reads the data from a scanned invoice** straight into the expense form. Just by uploading a PDF or an image of the invoice, the system recognises the supplier, dates, amounts and every line item. You review the data and save.
**In this article:**
- [Document limits and parameters](#limits)
- [How to add a document from a scan (Expenses tab)](#scan)
- [Even faster: invoices by e-mail (Inbox)](#inbox)
- [How to check how many scans you have used](#usage)
## Document limits and parameters
Your paid subscription includes **OCR scans that renew automatically every month**:
| Plan | Free scans / month |
|---|---|
| Micro | OCR not included |
| Basic| **3** |
| Professional | **5** |
| Enterprise | **10** |
- Unused scans do not carry over to the next month.
- 1 scan = 1 document page. A 3-page invoice = 3 scans.
- Need more? You can purchase an additional OCR package — contact support: info@invoiceocean.com.
- Supported formats: PDF, JPG, TIFF, PNG, GIF
- Maximum file size: 50 MB
- Maximum number of pages: 100
- Optimal resolution: 300 DPI
## How to add a document from a scan (Expenses tab)
1. Go to the **Expenses** tab.
2. Click the arrow next to **Add new expense** and choose from invoice scan or simply drag the file onto the *“Drag and drop the file or browse”* zone at the bottom of the list.
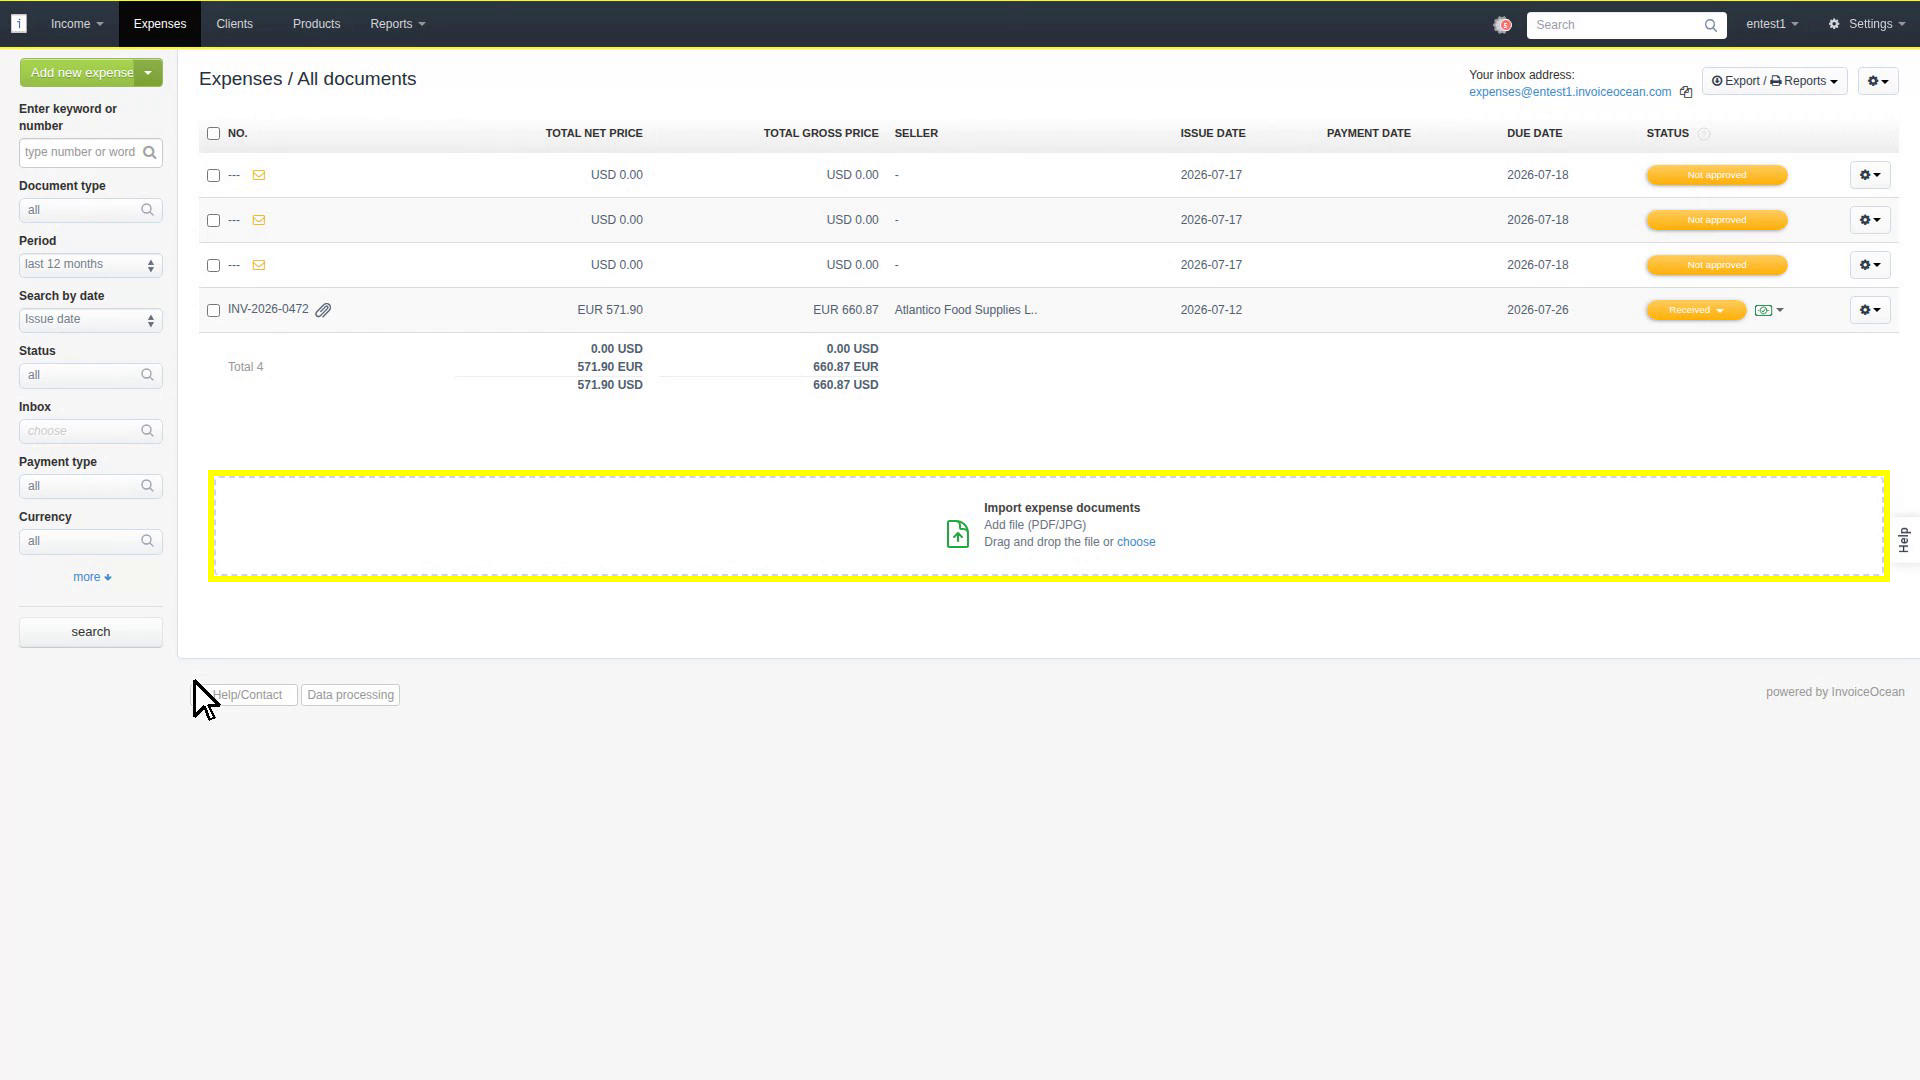
3. OCR reads the document (a few seconds) and takes you to the pre-filled expense form: supplier with VAT ID, dates, number, payment details and every invoice line with its VAT rate.
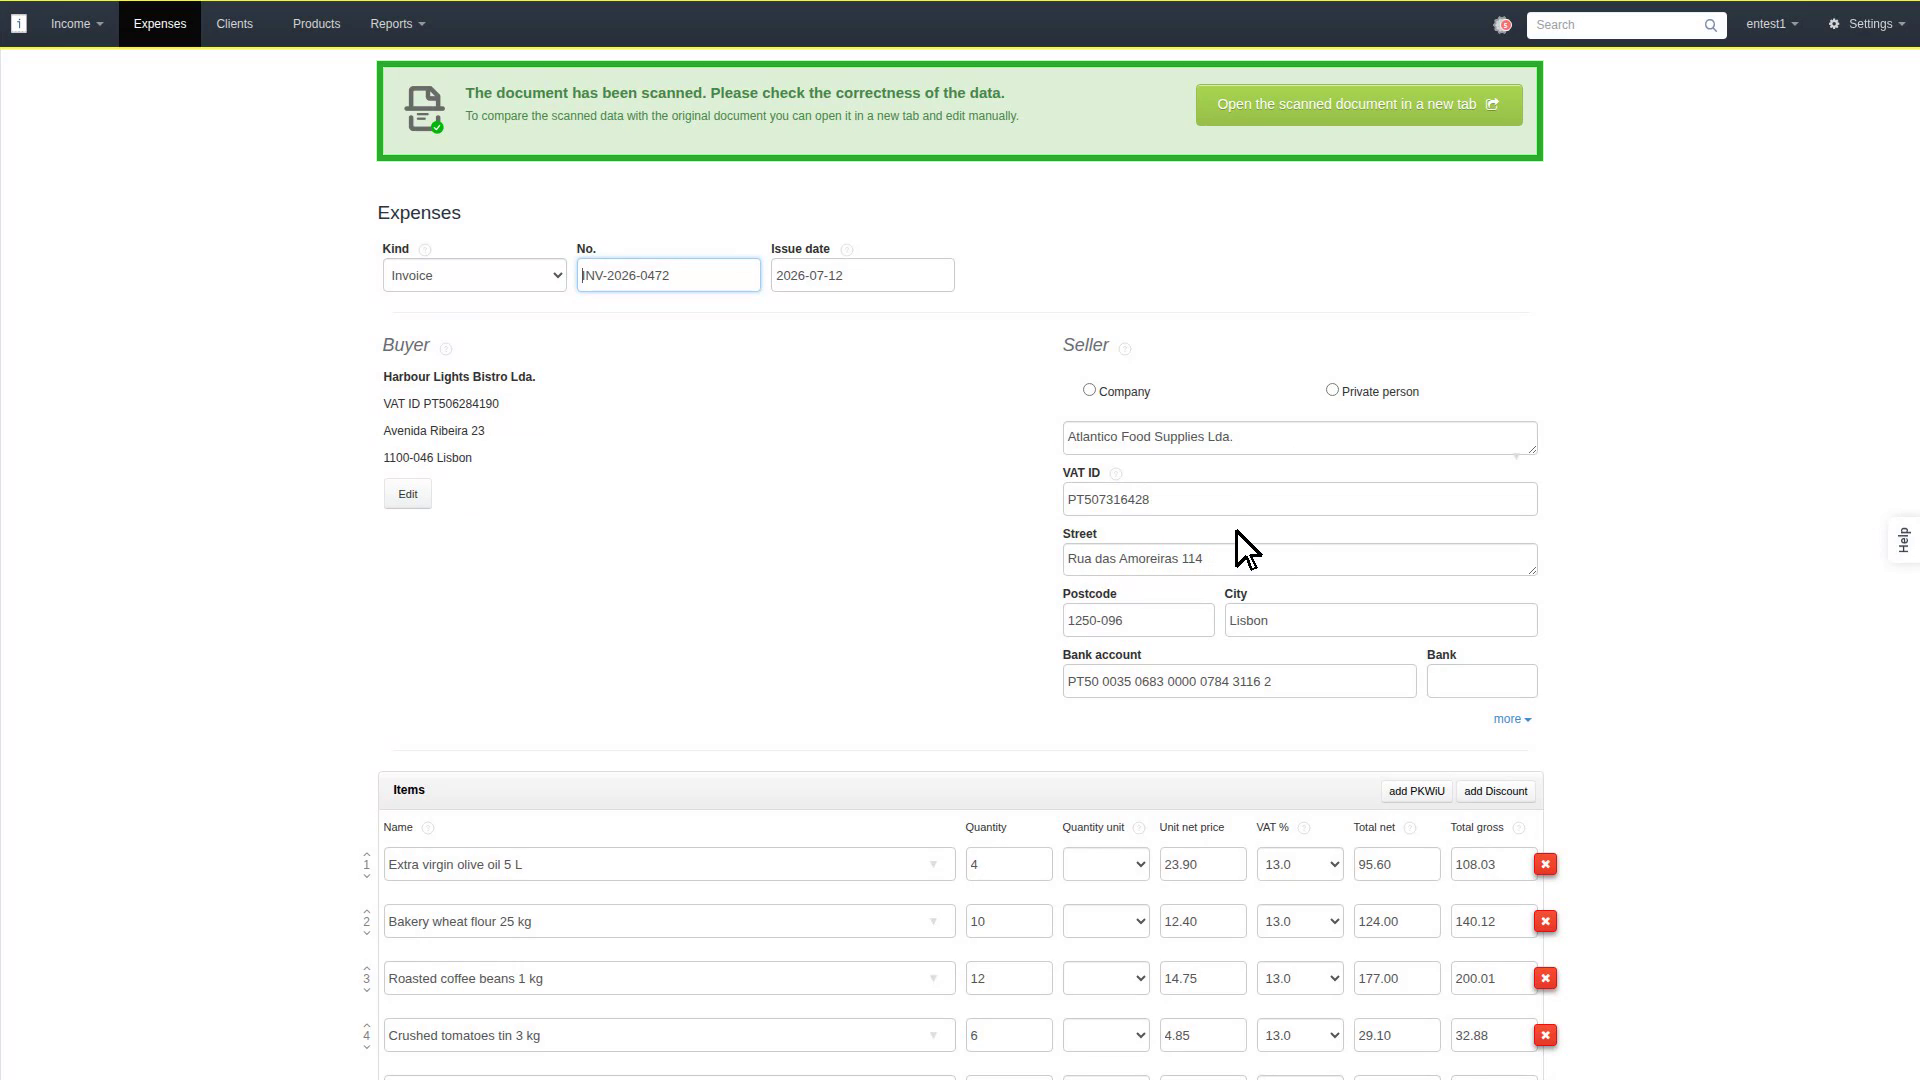
4. At the top you will see the notice “\*The document has been scanned. Please check the correctness of the data.\*” You can open the original document in a new tab to compare.
5. Review the data, correct anything that needs it, and click **Save.** The last word is always yours: OCR fills in, you decide.
The original document stays attached to the expense, so you can always go back to it.
## Even faster: invoices by e-mail (Inbox)
Every account has its own **e-mail address for expenses** (you will find it at the top of the Expenses list). Forward supplier invoices there, or set up automatic forwarding, and the documents will appear on the list by themselves, marked with an envelope ✉️.
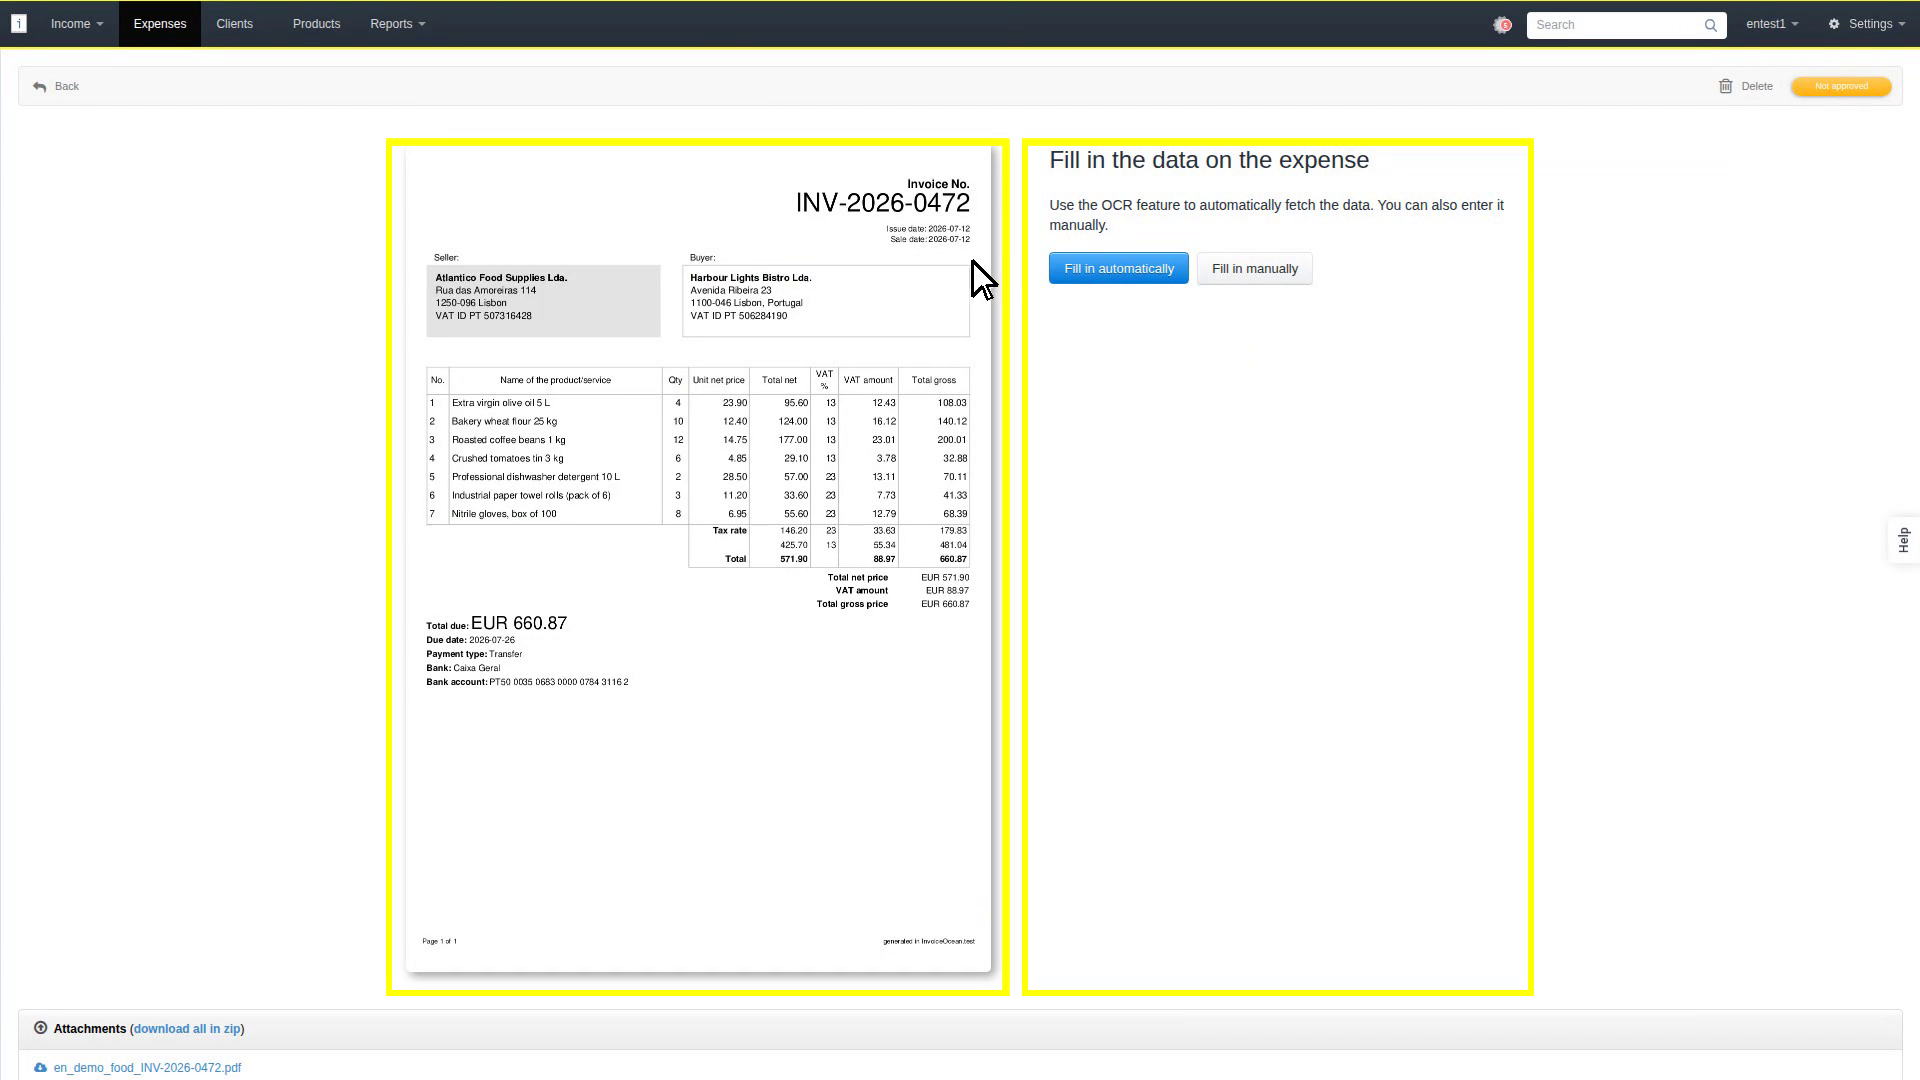
When you open such a document, you will see the PDF and the form side by side. Click on the option **Fill in automatically** and the OCR will complete the fields; verify the data against the original next to it and **Save**.
## How to check how many scans you have used
Your current usage is shown under *Settings → Activity*. When you approach the monthly limit, the application will also warn you directly on the Expenses screen.
---
*Questions? Write to us: info@invoiceocean.com*
---
## Powiązane
- [Inbox – expenses inbox](https://help.invoiceocean.com/197443222-inbox-expenses-inbox.md)