In InvoiceOcean, it is possible to create separate companies and departments within a single account. Thanks to this option, you can create documentation for several branches of one company (with one TAX ID) or for several companies with different TAX ID numbers under one subscription fee. In this article, we will explain how the multiple departments and multiple companies option works within an account.
Everything about the multiple companies and multiple departments option in an account
- 1 in the Free and Basic plans,
- 3 in the Professional plan,
- Unlimited in the Enterprise Plus plan.
To correctly add a new company using the multiple companies option within one account, go to:
Settings > Company/department > Add new company > Add company by department.
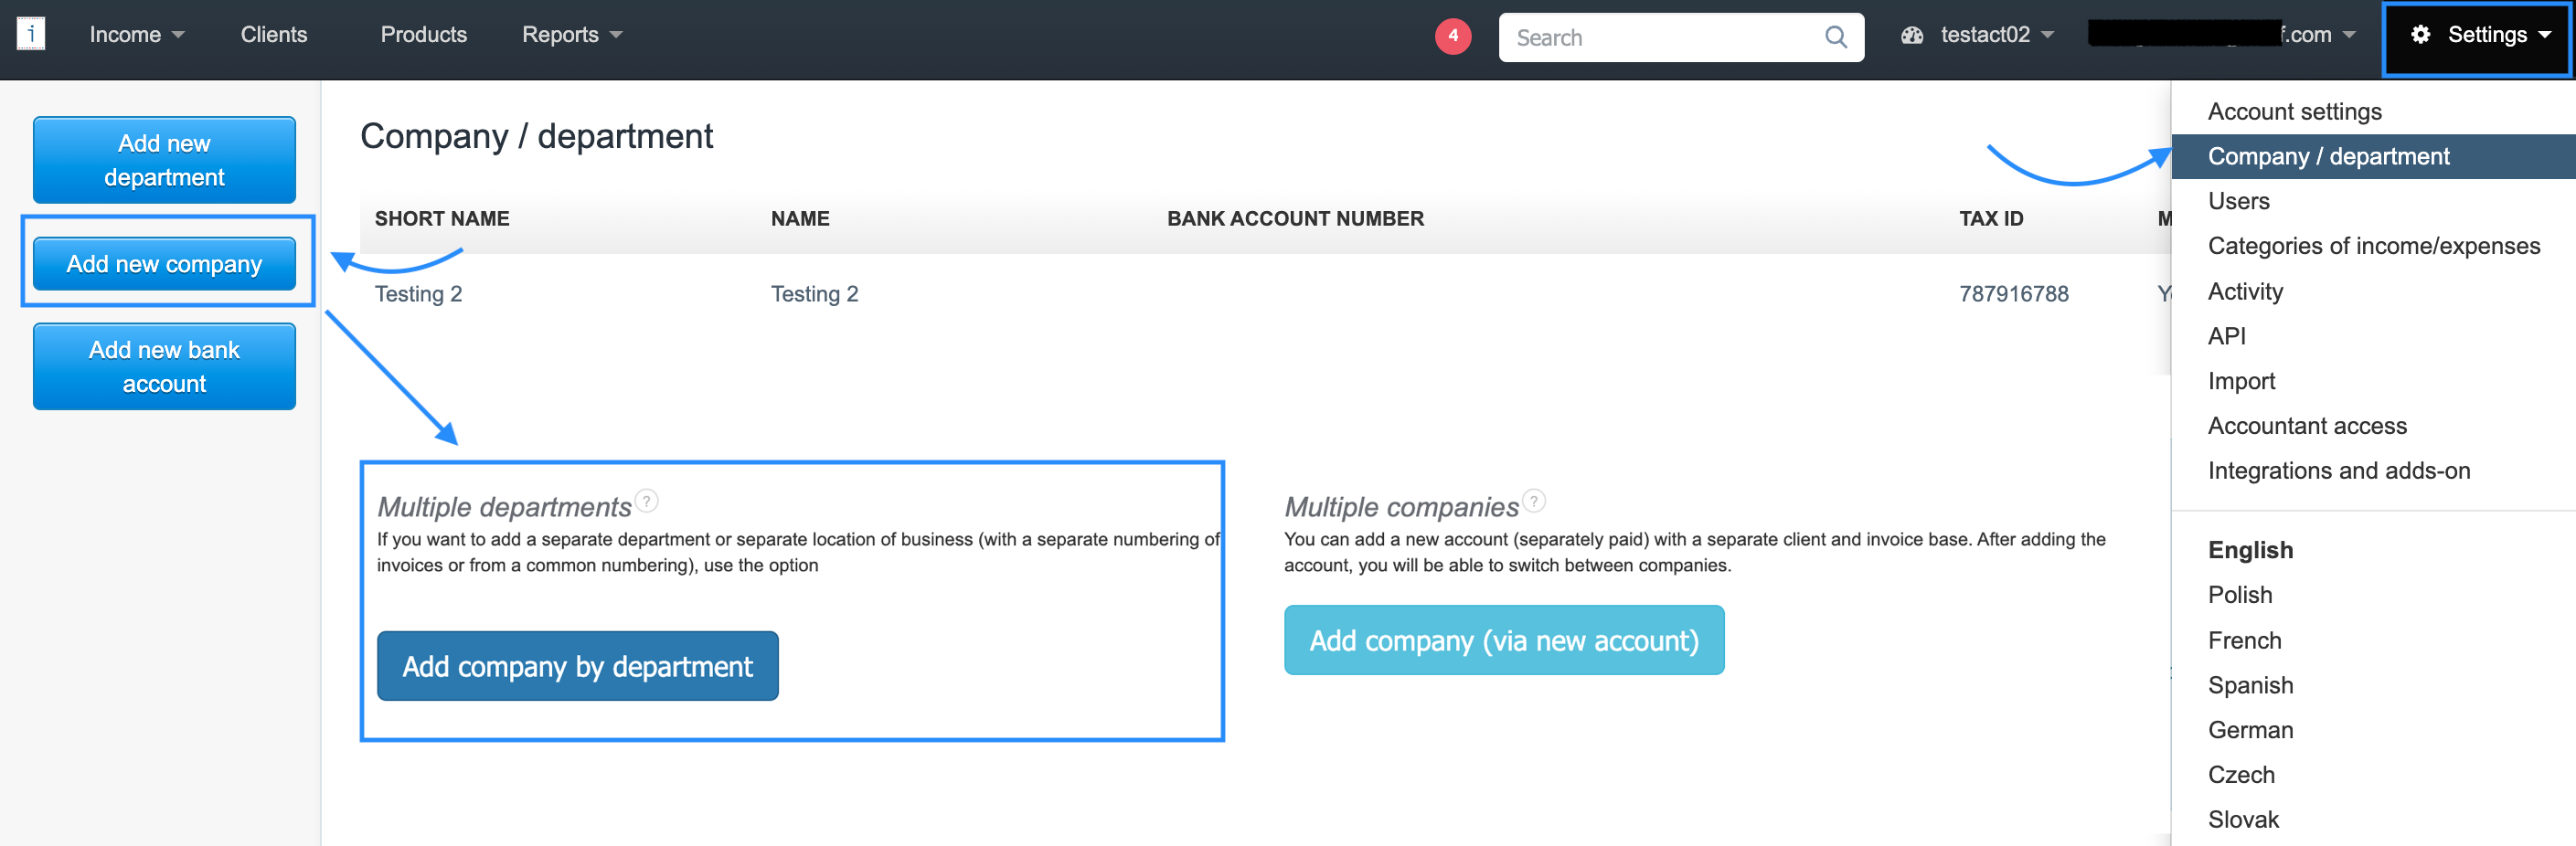
When to use the multiple departments option?
A separate department within a company can, for example, be a different location, a separate bank account, or an individual store if you run more than one. This is also a good solution if you sell your products in a foreign language or different currency, you can then create a separate department for invoices in German and another for invoices in Spanish.
In the Company data tab, departments will be grouped according to their TAX ID number.
New company added as a new account
A new company added using the Add company (via new account) option will create a completely new account within the same user profile. By logging in with the same email address and the password assigned to it, you gain access to all accounts in the system that are linked to that email/login.
The option to switch between accounts is available from the main menu. Between the Search field and your email address, you will see the name of the account you are currently logged into. Simply click that name to display a list of linked accounts that you can switch between.

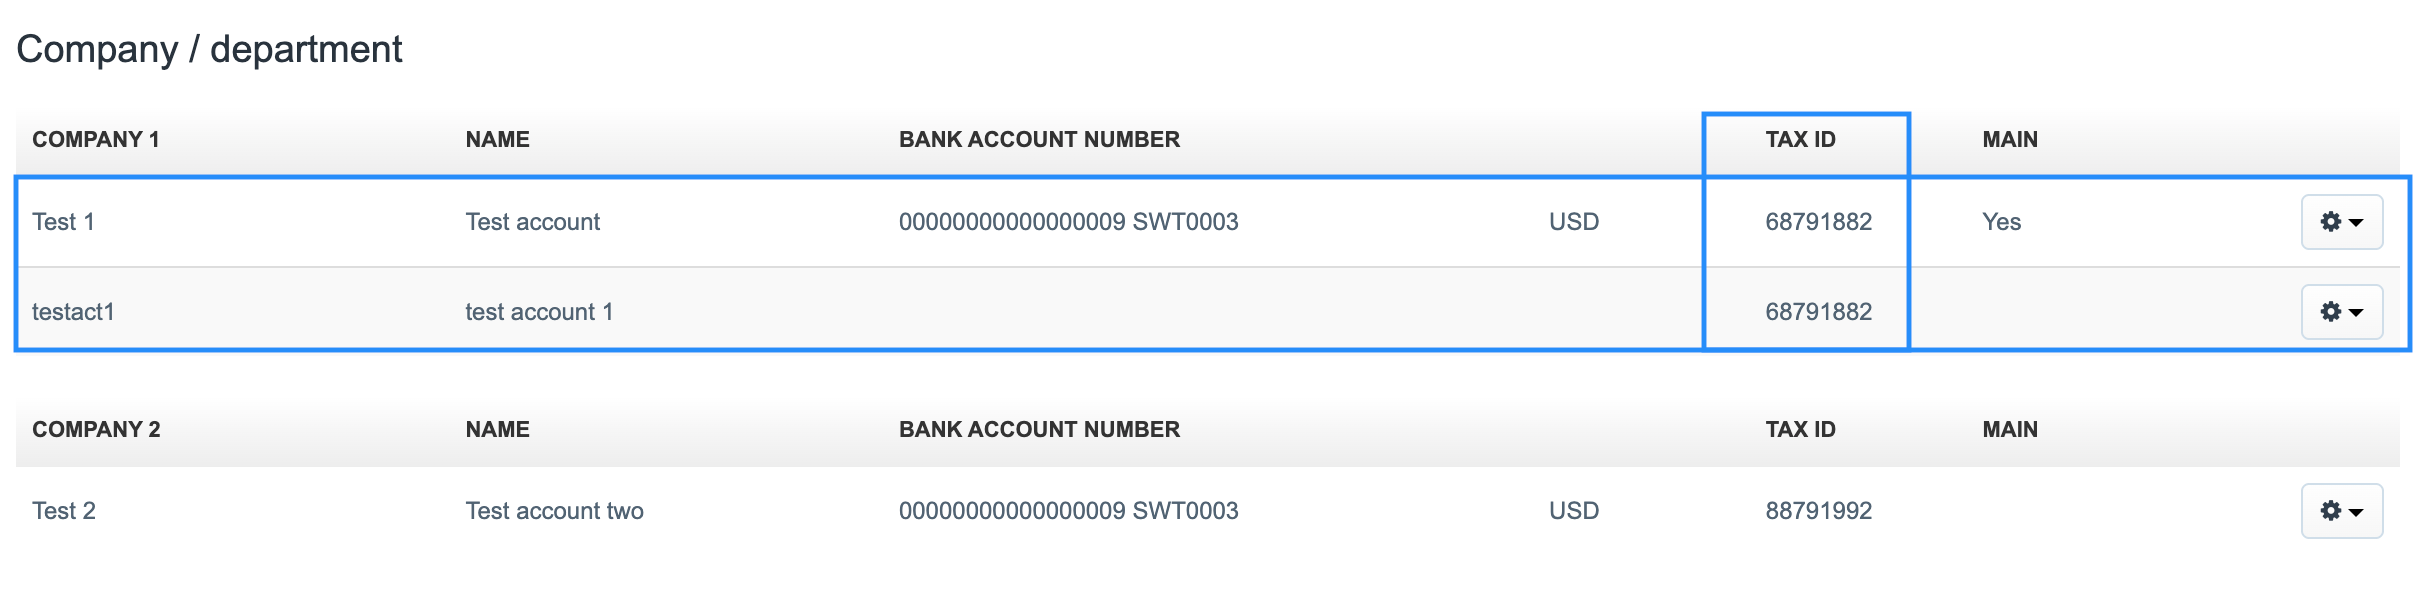
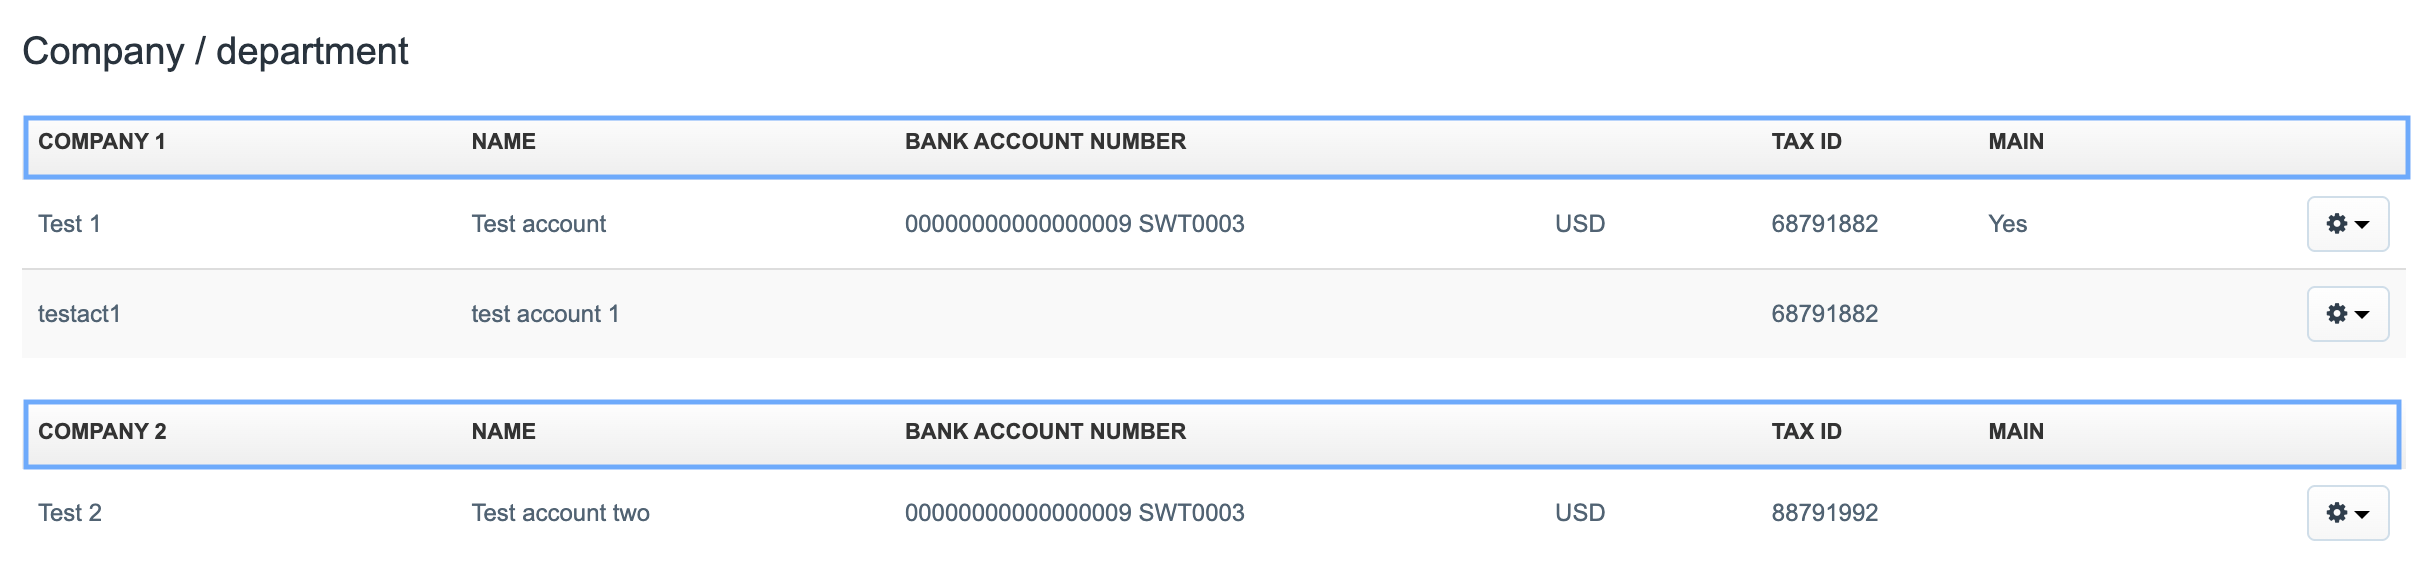
When it comes to the difference between creating a new company and a new department, it lies in the fact that the company’s departments share the same TAX ID number, and this TAX ID will also appear in the TAX ID field when you want to create a separate department of the same company. If you choose a different TAX ID, the department will automatically be assigned to the company to which that TAX ID belongs. However, if you decide to enter an entirely new TAX ID, the system will immediately give you the option to create a new company instead of a new department.
The image below shows the difference in appearance between multiple departments and multiple companies in the Settings > Company/department tab.
You can read more about departments, companies, and bank accounts (their creation and the differences between them) in the article New department, new company, new bank account – what are the differences and how to add them?
Companies or departments within one account
If you add a new company as a department within one account, then the customer database and product database will remain shared for all companies under that account. From a single account on paid plans, you can add any number of separate departments. However, separate companies within one account can only be added starting from the Professional plan.
To add a department or company within one account, go to Settings > Company / department. After adding departments/companies, you can switch between them when issuing invoices. You can read more about this in the article How to change a department when issuing invoices?
Separate numbering for departments
For each department, we can specify whether we want to have separate numbering. However, within a single account, the system does not allow two invoices with exactly the same number to be issued in the same year. Therefore, if you want to have separate numbering for departments, it is best to add, at the beginning of the numbering format, for example, a letter or a company abbreviation that identifies the department. This way, each department will have unique invoice numbers. You can read more about this in the article Separate numbering of invoices for different departments.
Separate currency for each system department
In each department, you can freely set the currency, which will automatically change on the invoice form when you select that department. You can find an article explaining how to specify the department’s bank account currency in Bank account currency.
Other separate settings within a department
Within the department settings, you can also choose:
- The default invoice template;
- the default tax rate on the department’s documents;
- the default language for invoices and documents;
- the default logo;
-
default notes on invoices.
Companies as separate accounts in InvoiceOcean
Under one email address, you can have several accounts (each with a separate paid subscription plan), within which the databases of clients, products, and documents will differ from those of the first account. You can read about how to add a company as a separate account, how to manage them later, and how to give other users access to manage them in the article New department, new company, new bank account – what are the differences and how to add them?
FAQ – Questions and Answers
Is it possible to assign a product to a specific department?
Yes, the system allows you to assign a product exclusively to a selected department/company. To enable the option of selecting data access on the product page, first go to Settings > Account settings > Configuration > Users and privileges. Under the option Product restriction, check the box and save the changes. Then go to the product page in the Products tab and, in the edit form, change the setting in the Company/Department (data access) field.
For more details, see the article Restriction to products visibility.