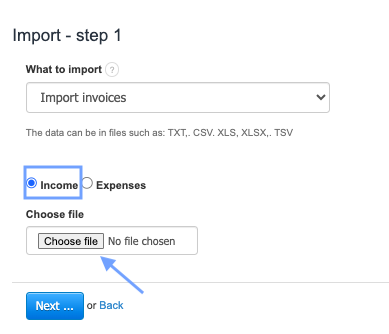
To import invoices to the program from an xls file, go to Settings> Import> Import invoices, check the Income box and click Choose file.
After clicking Next, the program will download the relevant data and display the status: Finished. Click the Review the data and import button.

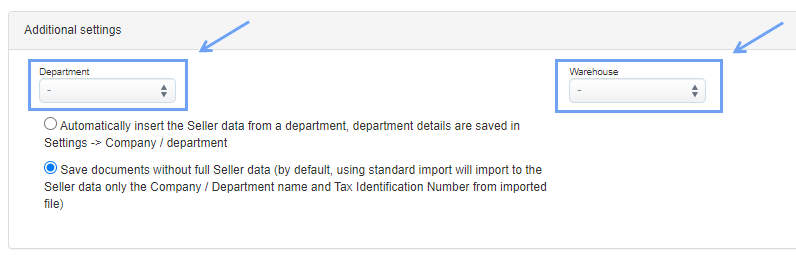
In order to assign the invoice data to the company's department, you no longer need to create a column with the company's department and enter the number of a specific department.
In the second step of the import, we added buttons in the system that will automatically assign invoices to a given company’s department and warehouse.
Then all you need to do is to use the Import data button.
Invoices should be assigned to the appropriate Department/company. You can check it by going to the list of invoices and selecting Department in the left sorting panel and selecting the appropriate department from the drop-down list.