Then, when creating an invoice, expand the options under the buyer's details by clicking more on the right
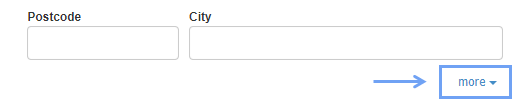
Then, click Delivery address (Addressee) and enter the data. To go to a new line, press the Enter key.

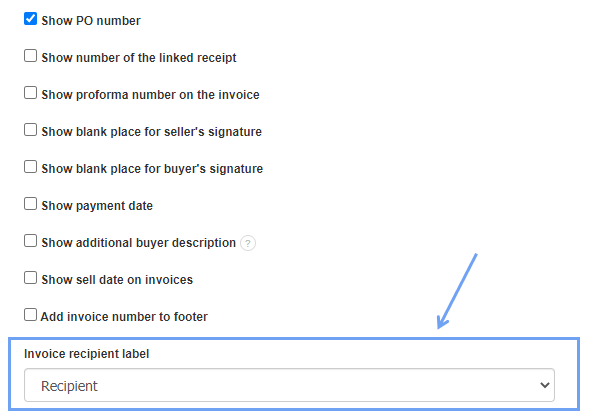
Unfortunately, I couldn't find an answer to this question.
Unfortunately, I couldn't find an answer to this question.