If you want to create a product in the system intended for online sales, go to Warehouse/Products > Add new product.
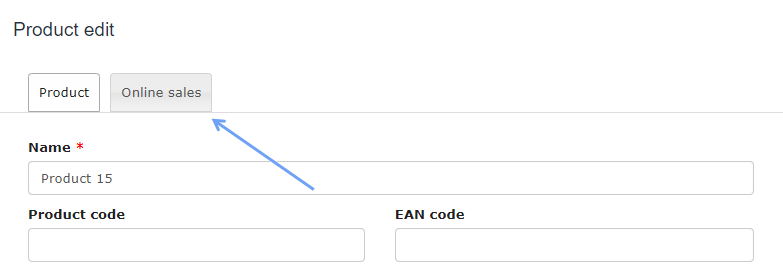
If you have previously enabled AutoPayments, an additional tab called Online sales will be displayed on the product card.
After clicking on this tab, select the Online sales check box. Please also pay attention to the information entered below this function.
After selecting this option, you might see the message Please choose the method of payment, in that case, click on the active link and define the payment provider.

If the payment provider is defined, you should see the product configuration screen (the screen is shown in two screenshots)
The most important functions are numbered:
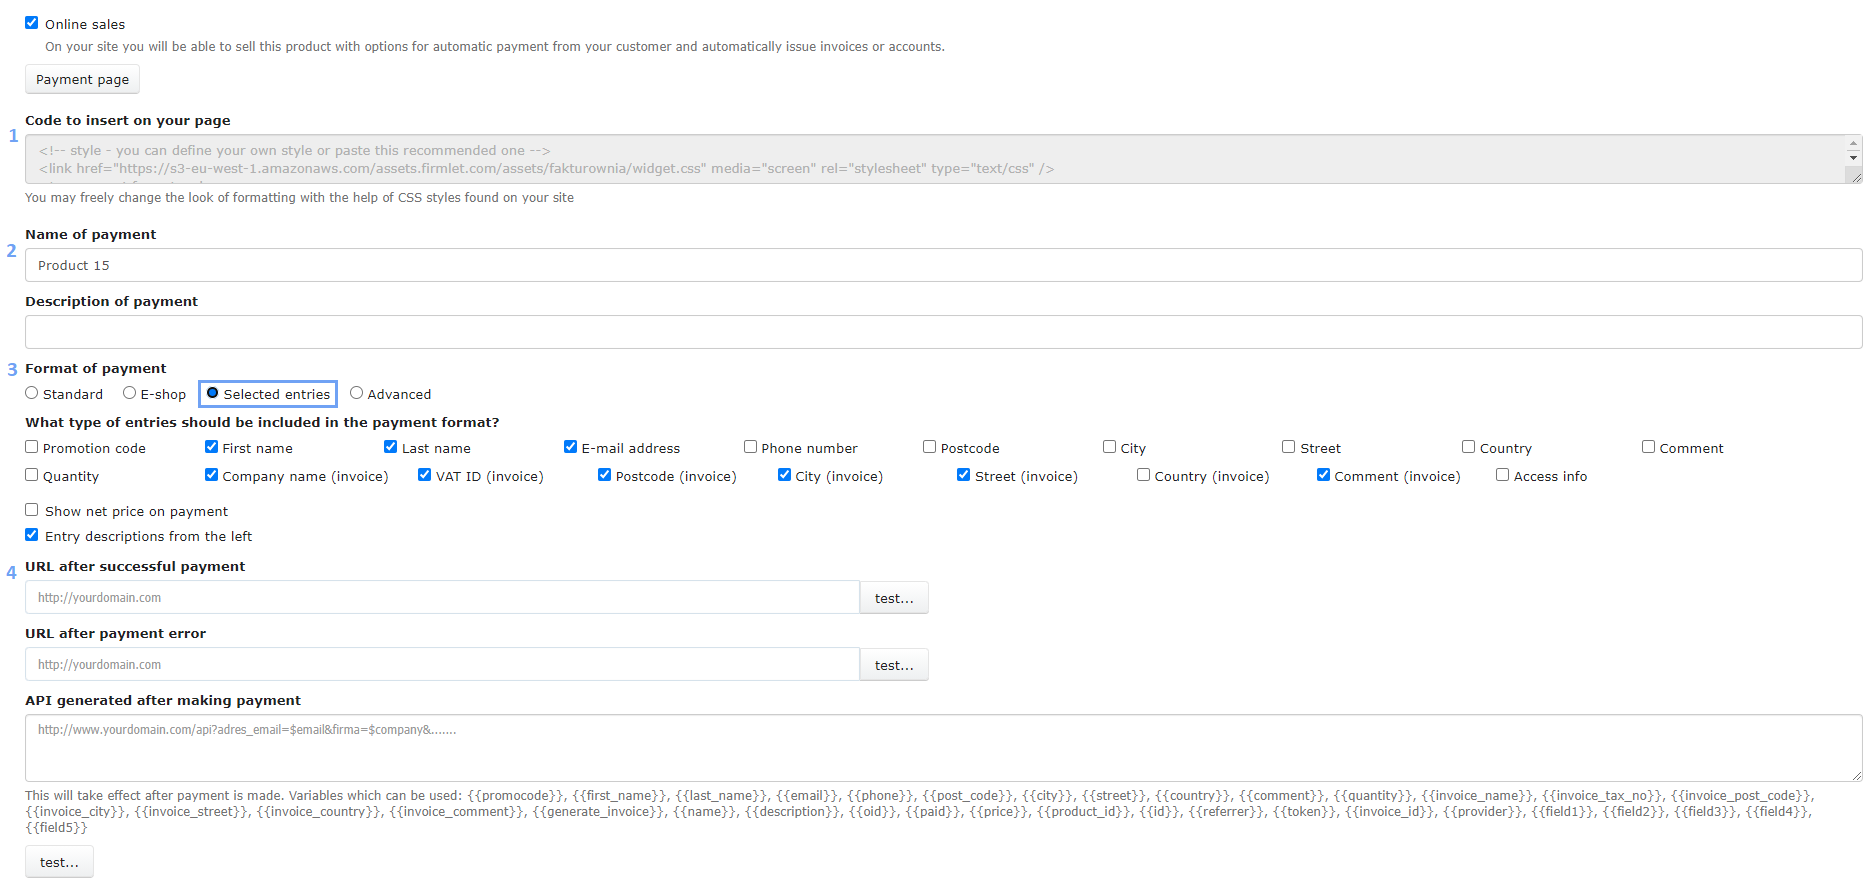
1) Code to inserted on your page. It can be modified with CSS styles, which are also used to configure the appearance of the page.
2) Name and description of the payment. Here you can specify the name of the product sold on the site and fill in the data with a detailed description.
3) Here you can create a Payment format and customize the fields manually (by selecting the field Selected entries).
In the system, you can also use the Advanced format of payment option. You can create your own payment widget using HTML and the fields that can be used in this format.
A list of available fields can be found directly below the editing box of the formats.

In addition to the fields already defined in the system, payments can also include field1, field2, field3, field4 and field5.
These fields can store 255 characters.
When creating an advanced payment form for a product, you can use fields like "field", for example like this:
<div>
<label> FIELD DISPLAYED NAME </label>
{{field1}} → the value from the format will be saved in this field
</div>
If the fields are added to the form, then you can also edit them in the payment view, but you cannot add these fields manually.
When it comes to the ID of these fields in the form, we have: “payment_field1”, “payment_field2” etc.
4) Site URL, which is displayed after the correct and incorrect payment.
An important field is API generated after making payment. It is required to communicate with an external system integrated with the sales service. Through the API, for example, a message about transaction data and that it was successful can be transmitted.
The API can also be used for communication within the system. In InvoiceOcean, we call API inside the system to check the client’s payment and to automatically update the account.
The rest of the product configuration screen looks like this:
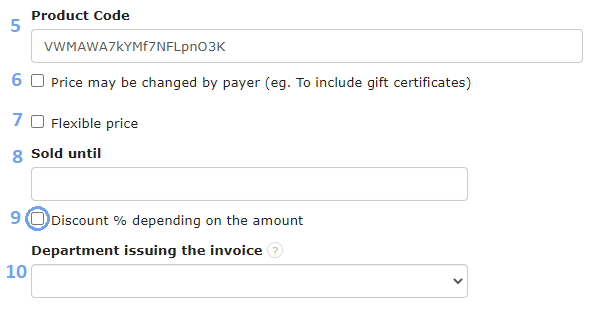
5) Product Code: A unique string of characters to identify the product.
6) Check box Price may be changed by payer (eg. To include gift certificates).
This box is useful if you use advanced payment format using HTML.
In the code, there is a Price parameter that the user can change to dynamically change the payment value.
7) Time limitation for the sale of the product
8) Checkbox for price changes, e. g. by the payer or change in price within a specified time.
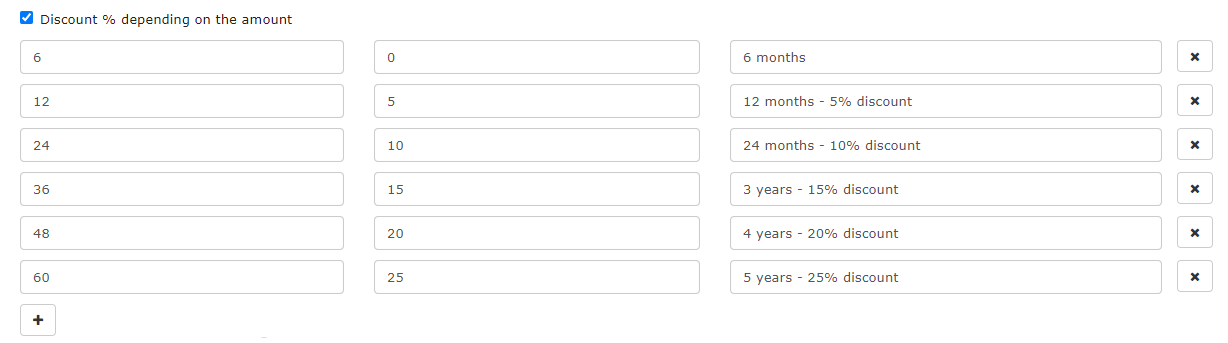
9) With the help of the checkbox Discount %, we can create different variants of product sales along with automatically assigned discounts. This option works very well for subscription sales.
As an example, we will show the InvoiceOcean subscription plan – the Enterprise version.
10) In this field, you can specify the sales department from which the sales document is created and sent to the customer.
In the system we also provide the option to filter products sold online.