Note, due to the complexity of the screenshots added in this guide, we recommend opening them in the new tab (please right-click on each graphic and select “Open in a new tab”).
It often happens that users as part of a package that offers the possibility to add several companies to the account in the system, create each of the companies in a separate account (which is a separately paid option).
When the documents are already issued on a separate account, and the user wants to use the service as part of the package and set up a company/department on the account paid in the system, you will also need to transfer the generated data, such as invoices, between accounts.

Export of file with documents
In order to transfer documents from a separate account, at the beginning you need to export invoices to the xls.
Having the XLS file ready, you need to import it to the appropriate department/company on your account paid in the system.
NOTE. Sample invoice import file can be found in Settings> Import> Import invoices> (blue window) See exemplary import file.
Preparing a file for import
Before you import invoices to a specific department/company, you should prepare the .xls file.
Open it as a .xls document and add the Department column at the end.
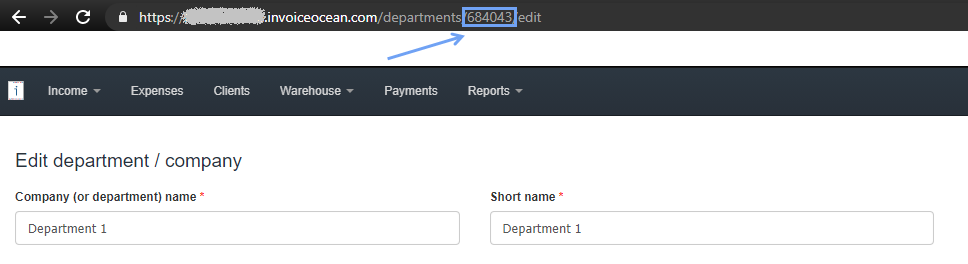
Without closing the open XLS file, go to Settings> Company / department, search for a department/company that you want and copy the identification number from the browser URL.
Then paste this number to the open XLS file and save the file.


Import of documents
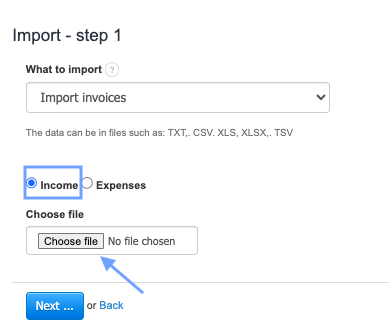
You are to import the xls file; go to Settings> Import> Import invoices, select Income and select Choose file.
After clicking Next…, the program will download relevant data and display the status Finished. Click the Review the data and import button.
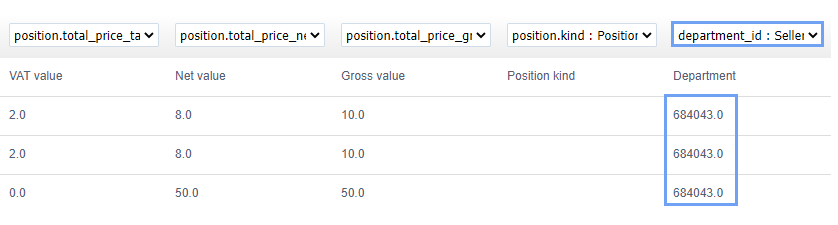
Then you can adjust the information about the department in the second step of import, selecting department_id from the drop-down list.
Now all you need to do is to use the Import data button.
Invoices should be assigned to the relevant department/company.
You can check it by going to the list of invoices and selecting Department in the left sorting panel and selecting the appropriate department from the drop-down list.
In InvoiceOcean you can also import other types of invoices or non-accounting documents:
- Import of Expenses,
- Import of invoices with incomplete data,
- Import of non-accounting documents.